Today, I have combined two vastly different systems using Node-Red to make a system that is useful for anyone’s home. In this blog, I will show how to make the same system.
For this system, you will need a few things:
- Node-Red installed
- A KNX bus
- An MDT controller (We used the AKS-0816.03 Switch Actuator)
- A Hikvision security device with some identification capabilities (We used the Access Control Terminal)
- An electric solenoid lock
- ETS5
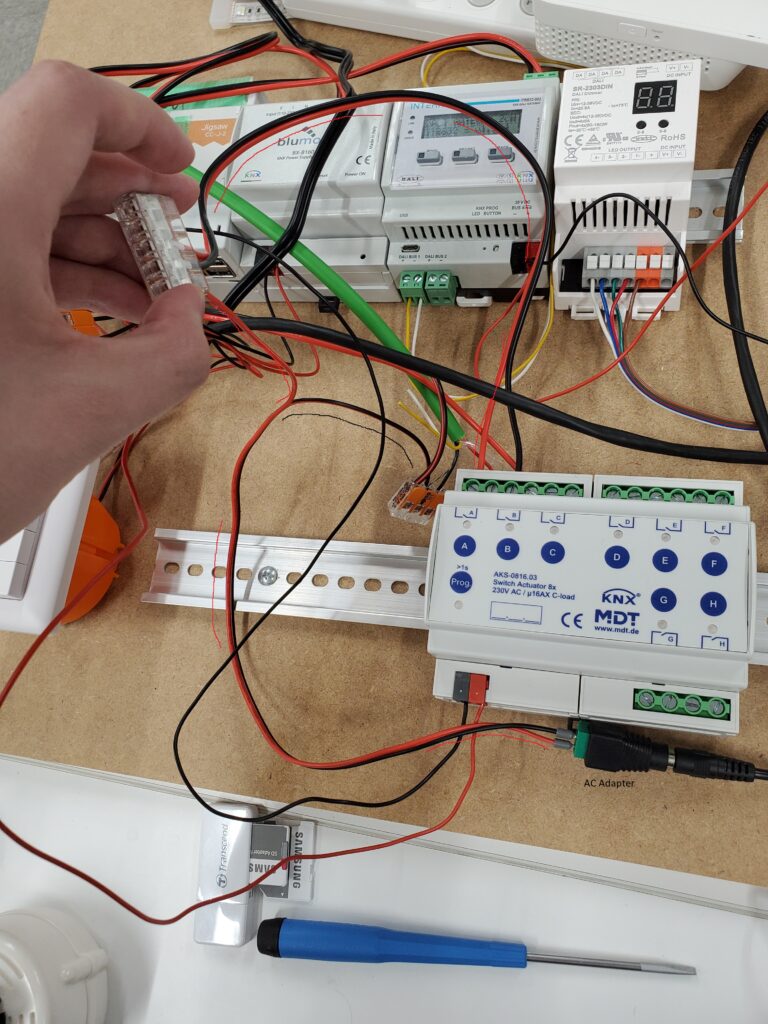
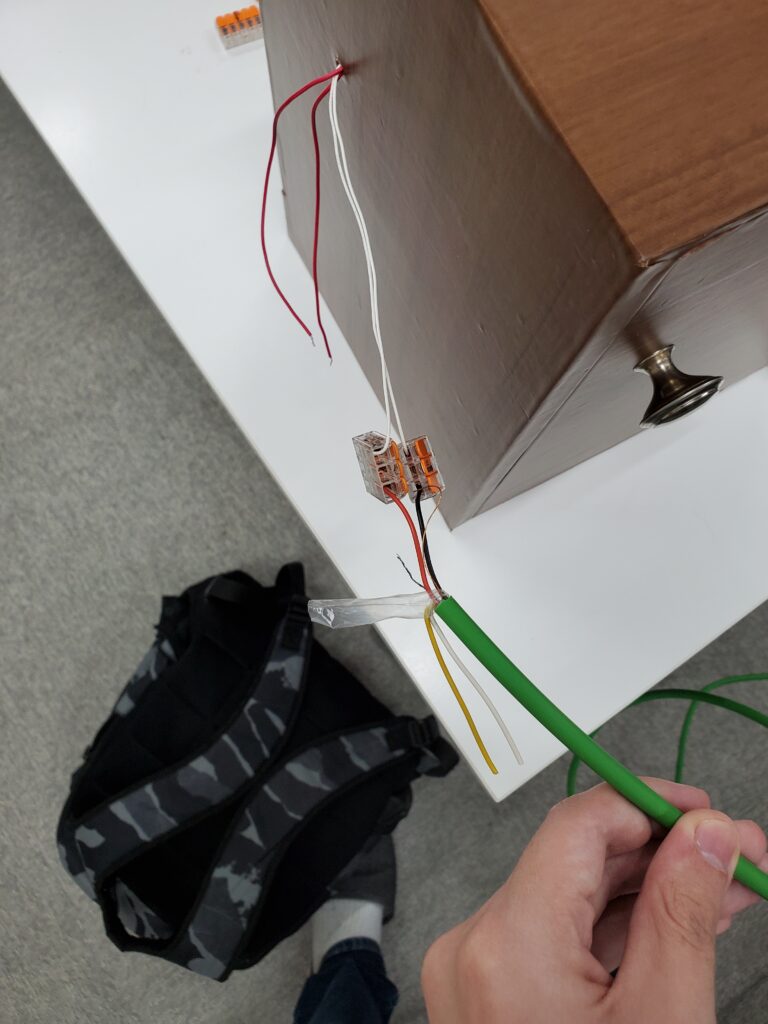
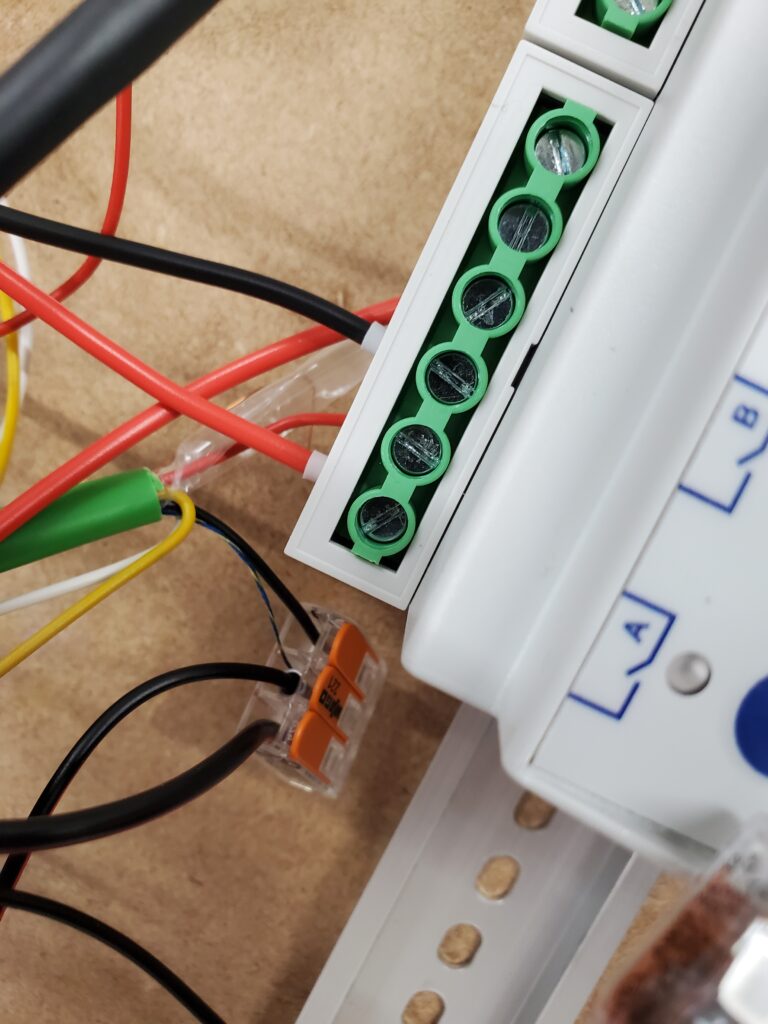
From here, you will first need to wire the solenoid you want to use to the MDT controller, this can be done in a number of ways but I will show the way that we did it as example.
First, you will connect a power source to each button you are using, this is done by connecting it under the first screw of each button, as each button has two screws assigned to it.
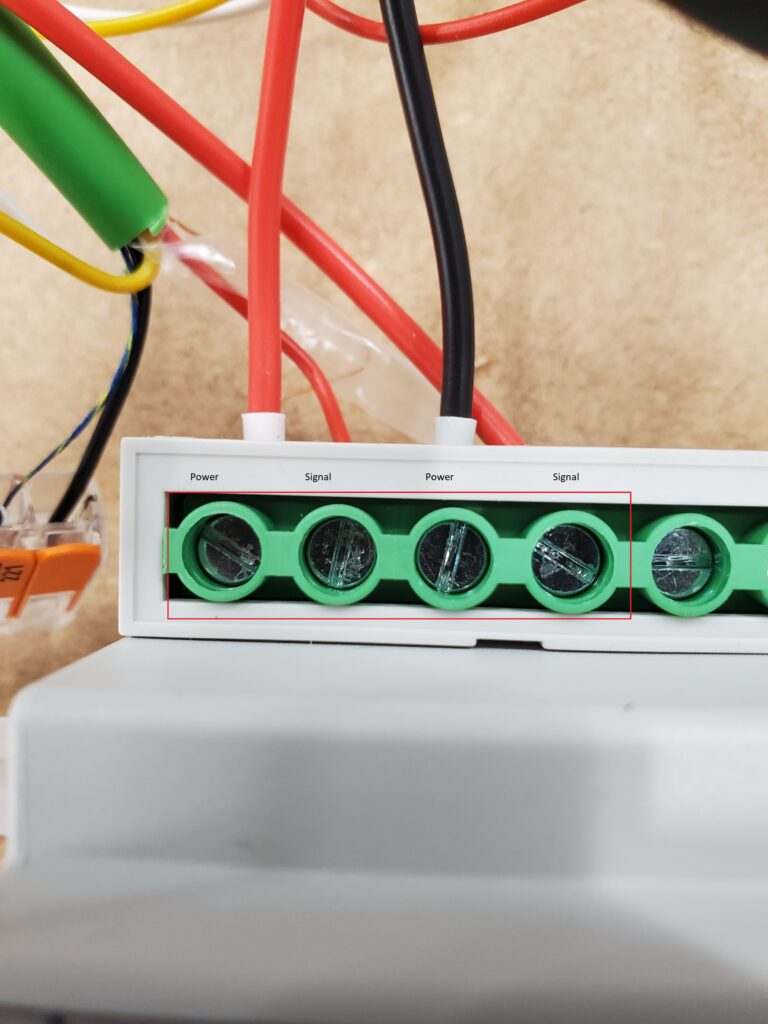
Next, you’ll want to connect the wires that the impulse signals go through under the second screw of each pair
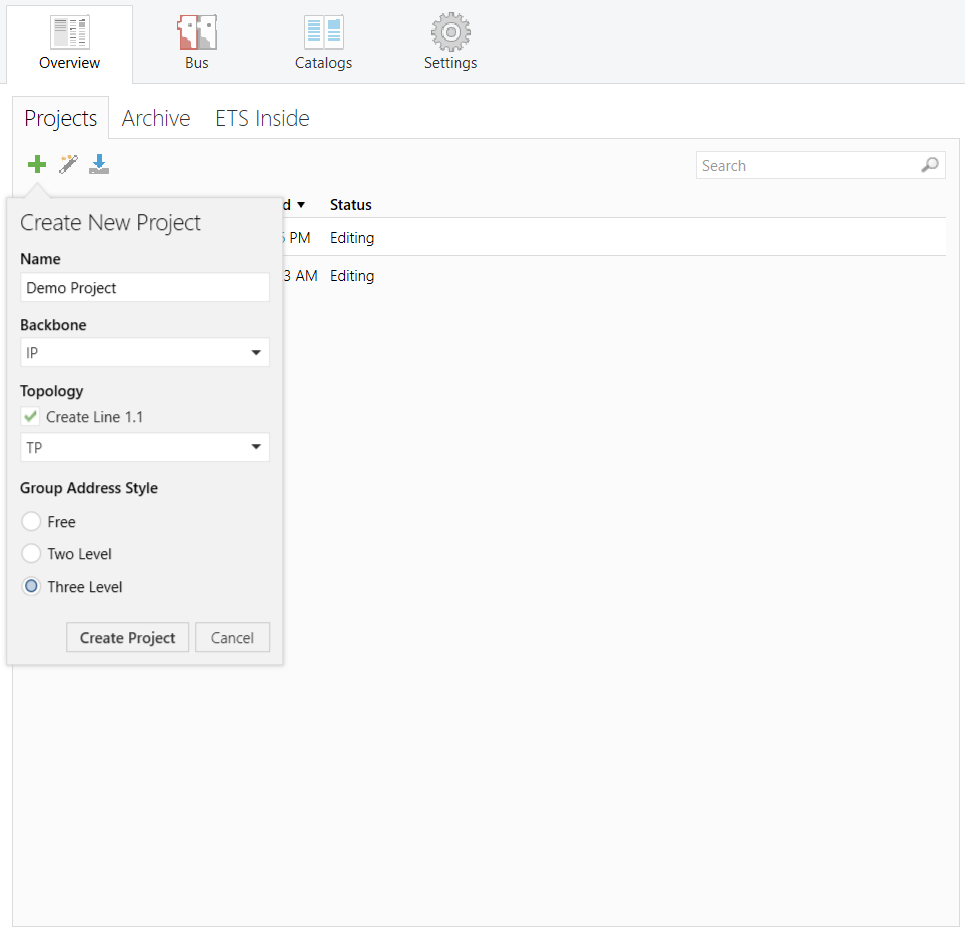
Now, we can technically control the doors with just the buttons on the MDT controller once it is properly wired up, but we can do much more with it. Now that the electrical work is done, we need to go to ETS5 to program the controller to work the way we want to, so we will first want a new project.
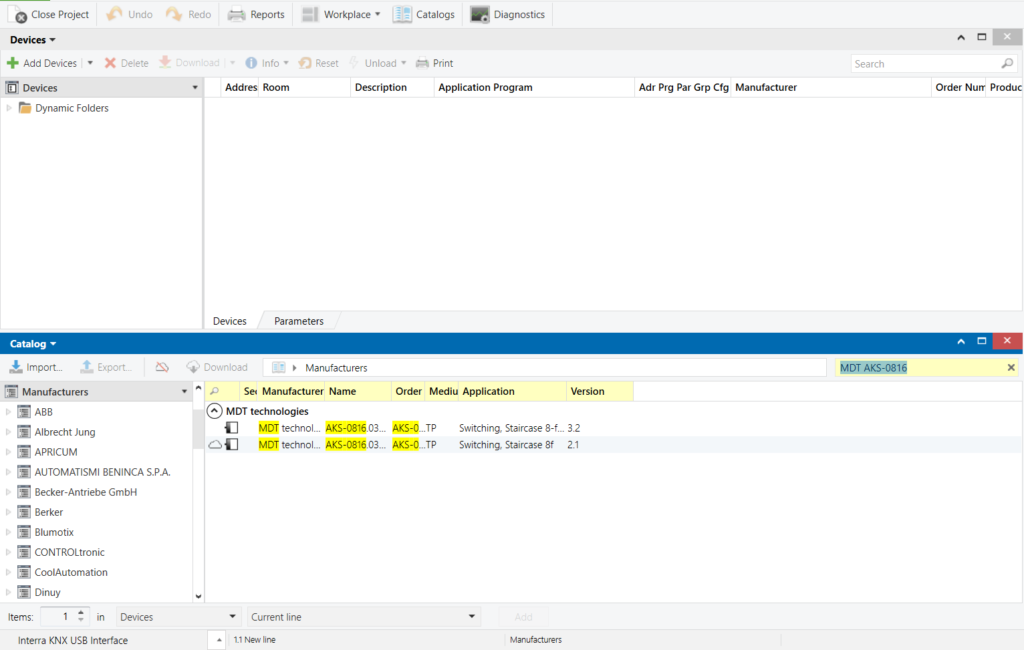
After making a new project in ETS5, you will then want to navigate to the “Devices” tab, using the dropdown in the top left, and then search for your device by name and add it to the project.
Once your device is added, click on “Properties” in the top right, if it is not already open, and change the last number of the individual address to something other than the default (no need to press “Park” or any other buttons, just change the last number, especially if you have multiple devices). Once done, use the dropdown in the top left that you used before to change to the “Group Addresses” tab.
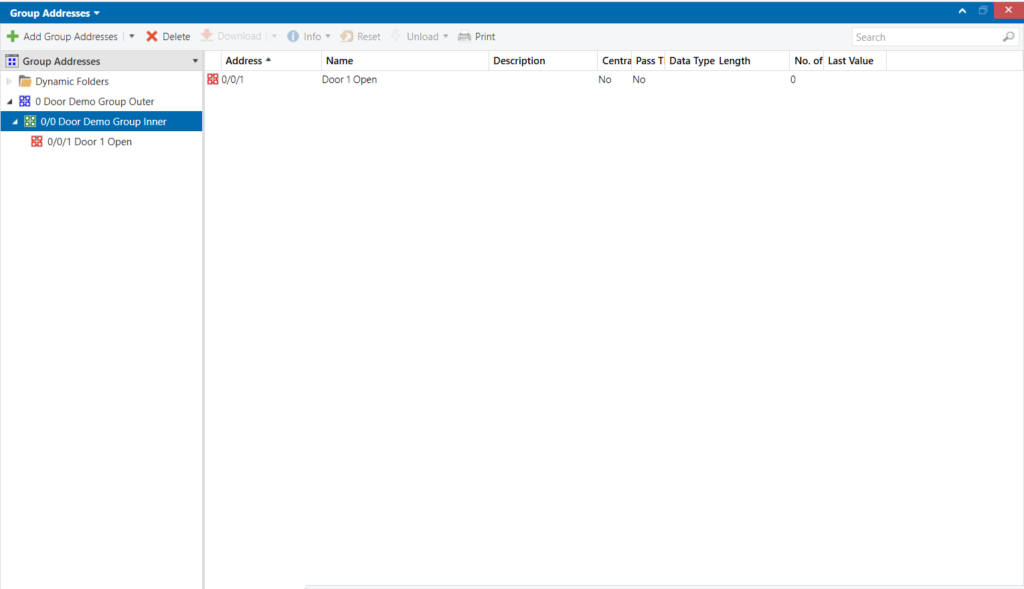
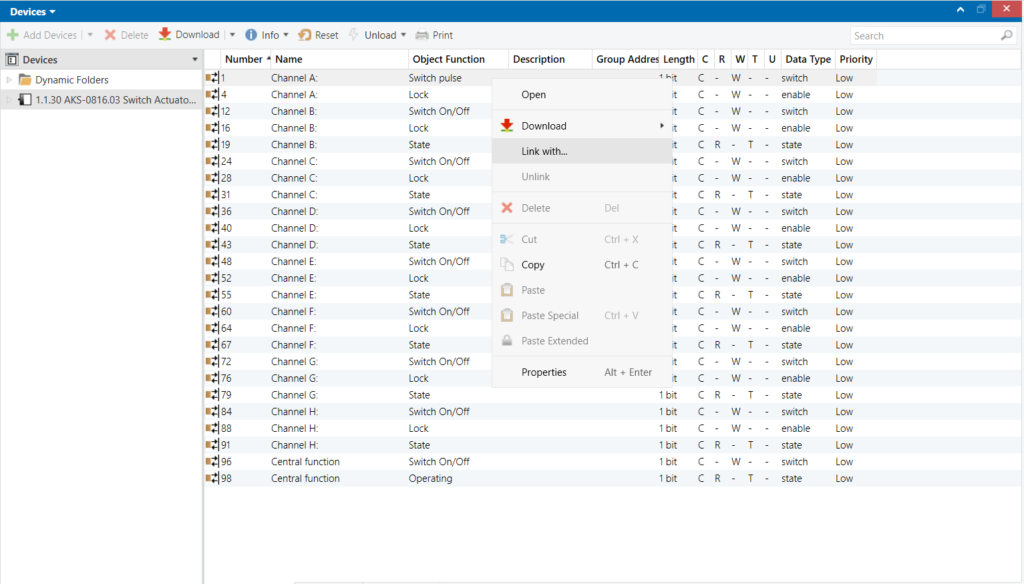
From here, add a Main Group by clicking “Add Main Groups” and name it whatever you want, then click on the Main Group you made and then make a Middle Group by doing what you did before, and then repeat the process one more time to make a Group Address, your screen should look like this now (but probably with different names)
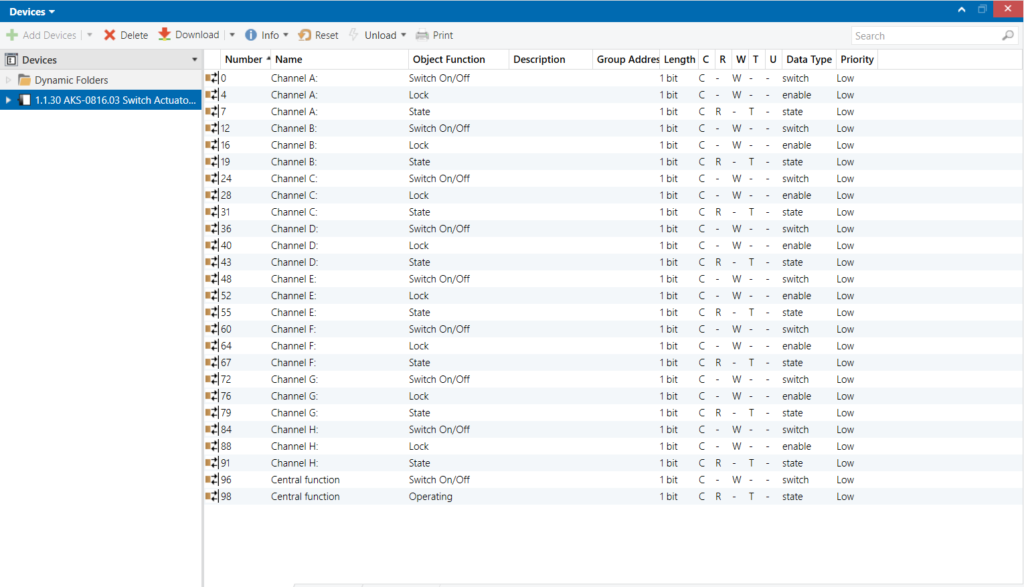
From here, we will move back to the “Devices” tab and click on our device, which should show a list of functions the device has.
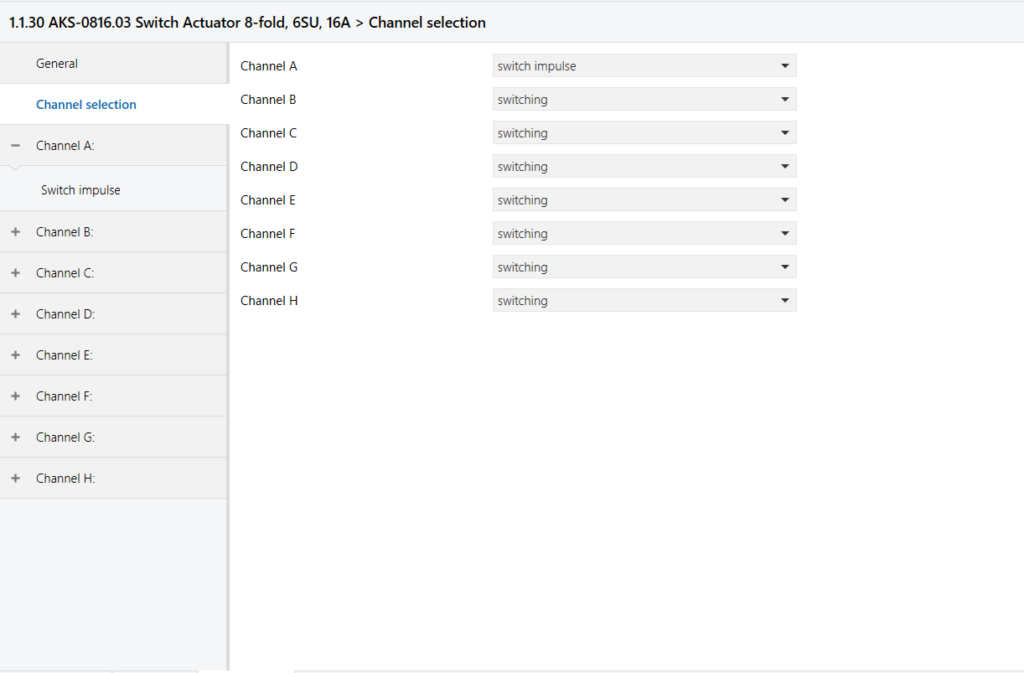
From here, select the “Parameters” tab at the bottom of the screen and select the “Channel Selection” tab, from here we can change how the buttons on the controller react to input and for the sake of how we have set up the Group Address, we will set the first button to “Switch Impulse”, if you do not have a “Channel Selection” tab and cannot find any options that control this, I will mention an easy workaround in Node-Red as doing this is really only for convenience.
Now, move back to the “Group Objects” tab, Since we’re just doing a basic Lock/Unlock on one door for our demonstration, we will just use Switch pulse function in Channel A. To link the Group Address to a function, right-click the function, select “Link To” and select the group address you want.
The last thing we need to do in ETS is to download the program to the MDT Controller. Select the arrow right next to “Download” and click “Download All” or “Full Download” to download everything to the device

Now we are finished with ETS, the button assigned to your lock on the MDT controller should now only send about a 0.5s signal rather than holding the signal until pressed again. We can now move to Node-Red as Hikvision only needs some identification set up using the SADP tool (We used our fingerprints for this system).
Inside Node-Red, you will want to make sure that you have the Hikvision-Ultimate and KNX-Ultimate packages installed so that you have the nodes that we are using. You can check your packages by clicking the three lines in the top right and selecting “Manage Palette”, if you do not have the packages then go to the “Install” tab and search the names below. MAKE SURE to install the package with the exact same name.


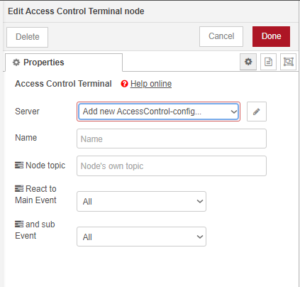
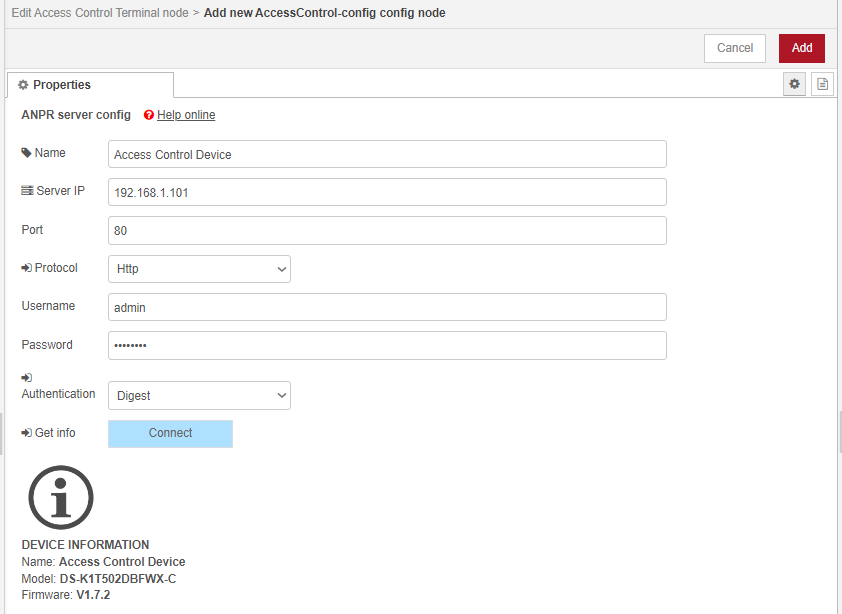
With the packages installed, we first need to connect to our Hikvision terminal and KNX bus to Node-Red which can be done by placing their respective nodes in a flow, double clicking to edit them, clicking the pencil icon next to the “Add new” dropdown, and then entering the correct information for your device.

For Hikvision, you will need the IP address of the device as well as your Username and Password for the SADP tool, the IP Address can be found in the SADP tool as well, click Connect at the bottom to get a first connection with the device and make sure the information you entered is correct. Click the red “Add” button when you are finished
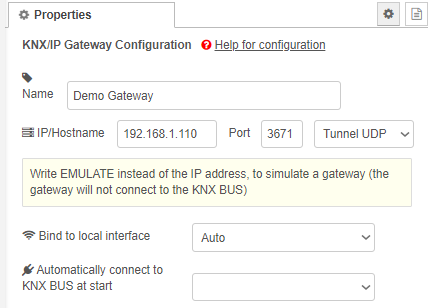
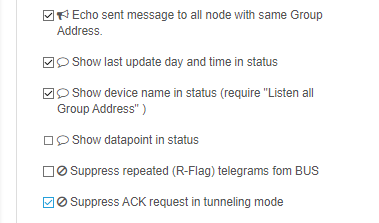
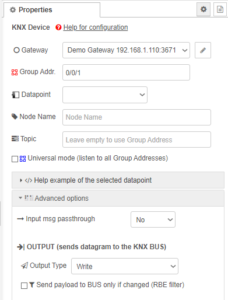
For KNX, you will just need the IP Address, which can be set in ETS5. Depending on the device you may also need to enable ACK suppression under the “Advanced Options” to keep it connected.
Once done, add the Group Address we used in ETS5 to the Group Address field in the main part of the KNX node, if you set the MDT button to “Switch Impulse” you will want to remove the RBE filter on every KNX device node you create, otherwise this method will not work.
Then, to have control the doors based on who was authenticated in the terminal, we will connect the via a “Switch” node.

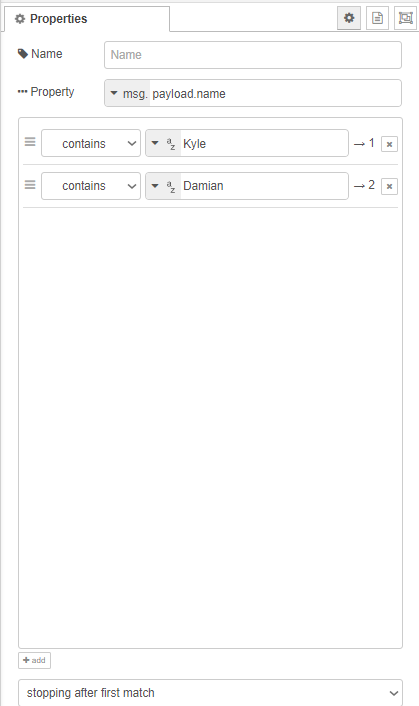
Double-click the node to edit it and then set the “Property” field to msg.payload.name. The Hikvision terminal outputs events in a JSON format, and this is how to properly access JSON objects in Node-Red, specifically the “name” field in the outputted JSON object. Once done, click the plus sign so there is a field for every name you want to use, set all the field’s dropdowns to “contains” and then enter your names in each field. Your “Switch” node should now look something like this:
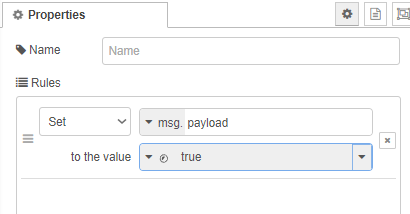
Now add a “Change” node to the field and just change its output to a Boolean and set it to true.
Now we can connect the the nodes. Connect the top output of the Hikvision node to the “Switch” node and connect the first output of the “Switch” node to the “Change” node, and then connect that to the KNX node.

Once finished, hit “Deploy” in the top right to test the flow and if it opens the door then you’re done. For every door you want to set up, you’ll need to make a new Group Address in ETS5 and program the MDT switch for that Group Address, as well as make another KNX node with the settings you need.